Thursday, June 30, 2011

Work Progresses

While I continue to paint kitchen and bathroom cabinetry, smaller projects fill the paint drying time. Today I accomplished two such tasks: recovering our bathroom seating and decorating the kitchen niche.

Our bathroom, like many in the neighborhood, contains a large garden tub which looks luxurious, but isn't very practical. Generally, it takes far too much hot water to fill and we have a spa in the backyard that affords a view of the early night sky. Thus, we don't use our tub and long ago Jeff upholstered a piece of MDF to create a seating (and storage) area where the tub sits. This is an ideal place to spread out accessories or put on shoes in the morning. However, the recent paint job in icy blue, left the red and gold fabric looking out of place. So, today's task was to recover it in a brown and blue paisley that contributes to the feeling of luxury. Take a look.

Here's the old upholstery with a fruit motif in reds and golds.

Here's how the tub looks sans cover. As you can see, we use it to store "wet" items like the steamers I need during bronchitis season.

Here it is with the new fabric and some pillows. While this photo makes the fabric look red, I assure  you  that it is blue and brown.

Here's a close up of the fabric. The flash still doesn't do the color justice. :(

Finally, the afternoon sun shows the colors better! Here you can see that it is kitty tested and approved by Bandit and Licorice.

Once this project was complete, I put another coat of paint on the cabinet doors and moved on to the niche in the kitchen. Following a friend's advice, I decided to cover the niche with fabric. Some research online pointed towards using starch to adhere the fabric to the wall without nails, etc. Unfortunately, I didn't have any starch and (I couldn't believe it) I was out of corn starch in the pantry! So, after a quick jaunt to Walmart, I was underway. Unfortunately, the liquid starch did not hold the fabric to the wall very well. After about 40 minutes of frustration over moving pieces, falling pieces, dry pieces, and not sticking pieces, I decided to resort to teacher mode and use a stapler. After all, I'm going to cover the edges with trim! I stapled the fabric as close to the edge as possible, and smoothed as I went. Another hitch in my giddy up occurred, though, when I reapplied the screws to hang the teacups. This seemed to pull the fabric loose on one side and I managed to send a cup and saucer tumbling to the floor when I tried to straighten it. (Note to self: always remove the teacups before fiddling with the fabric.) Luckily, I have others to replace the broken one (which I glued together and plan to use as a soap dish or candle holder). Suffice it to say, I was not happy with this project even though the end result looks pretty good. Tomorrow I plan to pick up some flat edged trip to hot glue around the fabric to give it a finished look. Here's what I have for now, though. The photos show the niche before fabric, with fabric only (when it looked its best), and with teacups (after I moved the fabric around screwing in the holders (which I painted black).


Tuesday, June 28, 2011

Still in the Kitchen

Today I began revamping  the kitchen cabinets, starting with the island (and the nearby bathroom cabinet). Since the project requires a few hours of drying between each coat, there was plenty of time to accomplish other tasks.

First on the list - hanging art. I recently purchased some blue-based prints featuring birds and flowers. (I'm just crazy about the bird motifs these days. I love the play of fresh colors with organic designs.) I bought a small pair for the kitchen (which I intended to hang over the sink, but changed my mind.) and another, fancier set for the archway - which ended up flanking the piano instead. (What can I say, I got them home and decided they'd be prettier elsewhere.) The pictures don't really do the pieces justice since the color isn't as clear. Suffice it to say they were a steel at $25 each from Ross. (The small ones were a bargain, too, at $12 a piece.) The little ones were also a good deal easier to hang since they only required a couple of small nails leveled out for balance. The larger ones, however, required plenty of measuring for the correct height and distance from the piano. In addition, they had hangers a couple of inches in from the edges, which makes life fun.

These now adorn the kitchen entrance.


In addition to these babies, I hung a black metal tray above my teacup display. (Mind you, it was gold and red before, but thanks to the wonders of spray paint it is completely transformed.) Prior to the current wall color, the niche where the teacups hang was a painted in a garnet red to accent the gold walls. Now, however, I'm not sure what color to paint it. I think white might not contrast enough (and certainly wouldn't set off the teacups) but black seems harsh. Brown doesn't really fit in with the kitchen area, while a darker shade of blue might look too much like a child's room. Hmmm...decorating dilemmas abound at my house!


Here's the tray above the niche.

Here's the niche - now looking rather non-descript.
In addition to putting some stuff on the walls, I decided to actually use my lovely kitchen for cooking. Dinner consisted of my take on oven spaghetti (pasta with a yummy sauce, covered in cheese, and baked until it's gooey) which made the boy pretty happy. (Let's face it, this kind of thing pleases just about everyone one.) I also used the remaining figs from last year's harvest coupled with the large bowl I picked a couple of days ago to make fig jam (at my mother-in-law's request). Since my mom clued me in last year on how easy it is to make jam, my family asks for it frequently. In this version, I only quartered the figs which left them in beautiful chunks throughout the sticky sweetness. Finally, while the jam boiled, I whipped up some baked chips from flatbread. (The store was out of whole wheat pitas when I was there, so I purchased a sun-dried tomato flatbread on sale.) While it was not as easy to cut as the pitas because the moisture content was a good deal higher, it made lovely chips to go with the remainder of my homemade hummus. All-in-all, I'd say it has been a pretty productive day!

One pan full of gooey deliciousness for dinner
Freshly browned flatbread chips

Five jars of lovely fig jam


Monday, June 27, 2011

Delicious Changes

Today's projects revolved around food, though not in the normal sense. Rather than cooking something fabulous (which I've been considering), I decided to make our eating spaces fabulous, instead. I cheated a little and bought some new chairs for our kitchen table at Ikea yesterday. The old chairs are going to Goodwill in hopes that someone more skilled than Jeff can give them new life. (Seriously, these chairs are really wobbly, and every time a guest sat in one I was afraid it might fall apart! Jeff fixed them repeatedly, but the last year or so he hasn't been able to make any progress with them.) Luckily for me, tall and shaggy knows how to follow Ikea picto-grams and use basic hand tools to put the chairs together after a morning trip to the grocery store. (By the way, can I tell you how much I love shopping on Monday morning! It's one of the best things about summer break!)

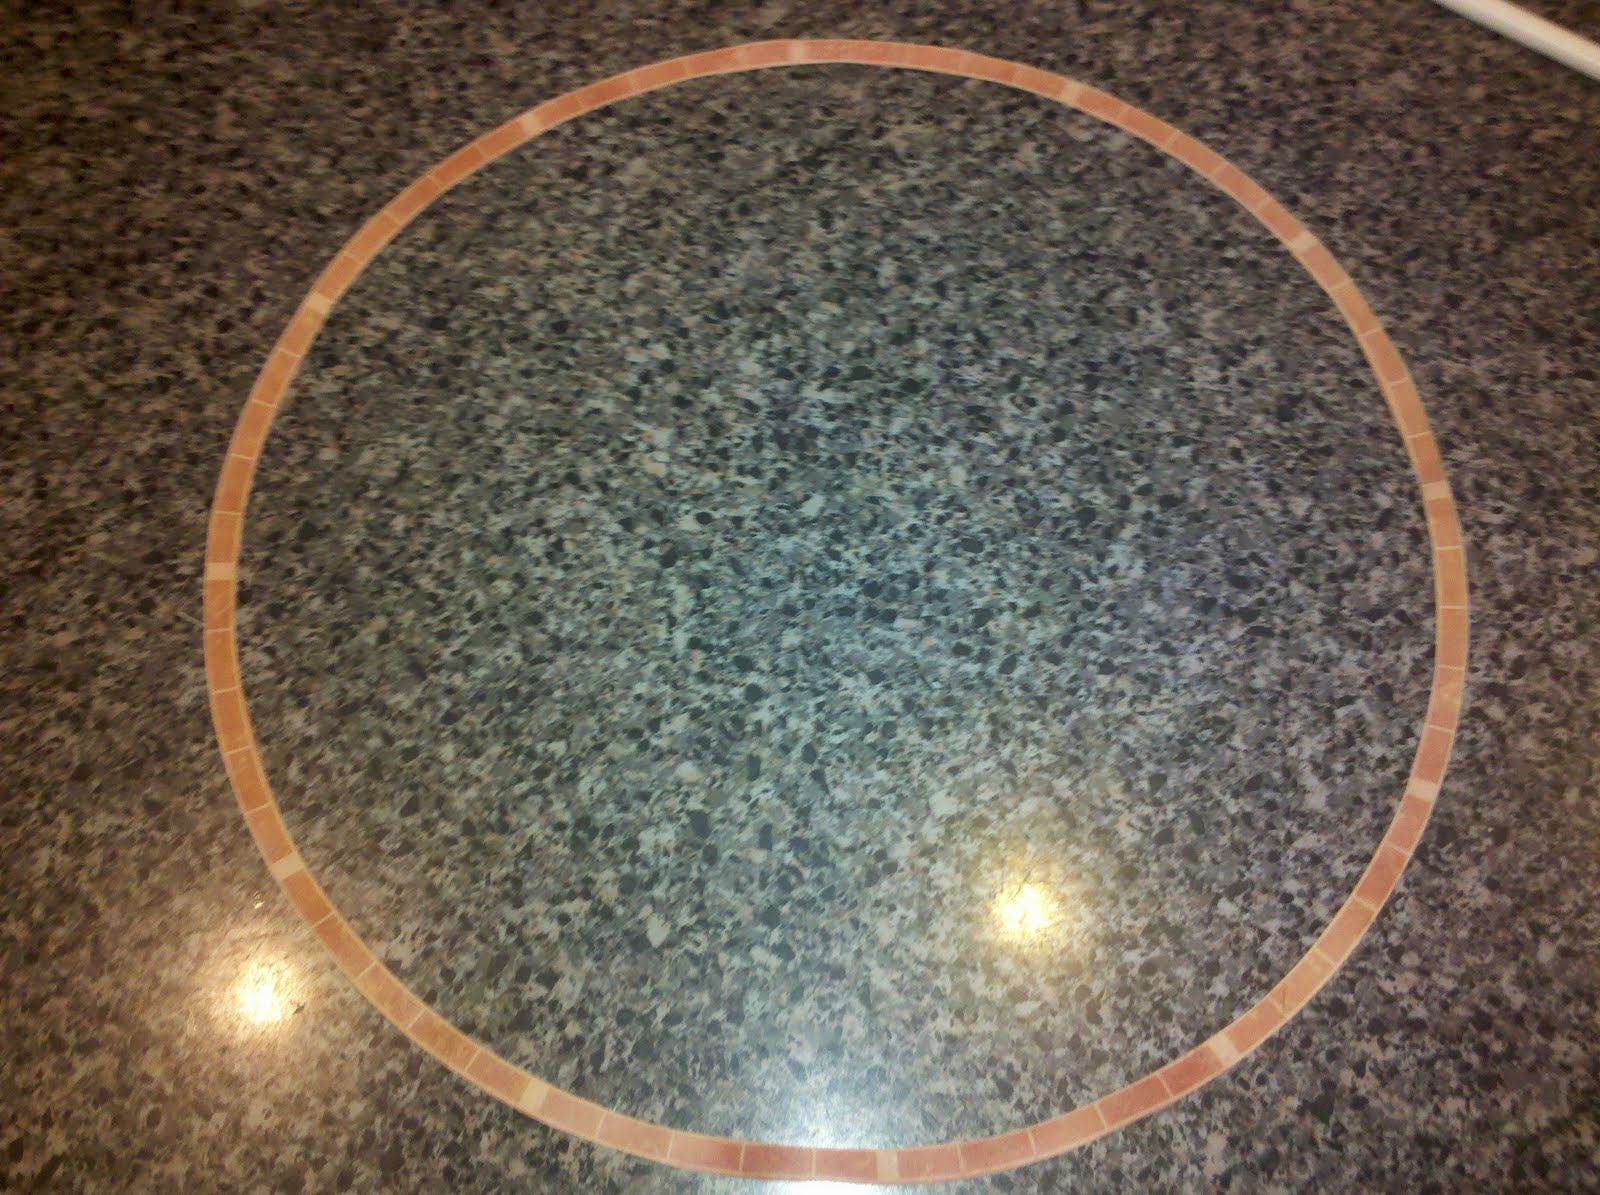
Once the chairs were together, I had to find a way to spruce up the table as well. It occurs to me that the before photo doesn't really show all the flaws with the glass top. First, we used it outside for awhile (at another house) and it became a little sand blasted with small abrasions on in. In addition, when we purchased this table (ump-teen years ago), we thought it would be easy to take care of since it is glass. (Just wipe it off, right?) Of course, the trouble is you have to wipe it off every 10 minutes! Suffice it to say, I've been itching to get rid of that table for awhile - and that was the plan. However, after looking at the money for paint, accessories, etc., I decided we couldn't afford to put in a new kitchen island (read much larger with a bar seating area) at this point. Thus, the old table has to stay awhile longer. Enter contact paper. That's right, as I was strolling through Home Depot (waiting for my cabinet paint to be mixed) I stumbled across a display of contact paper in a myriad of forms. (The stainless steel was really cool, but didn't seem to go with our decor!) I decided that $6.50 was a small price to pay for a new table top that I didn't have to flip and paint from the bottom (which was my first intention). The one I chose looks like black leather and feels pretty soft to the touch, giving the initial impression that the table has been upholstered. While it took a little patience to get out ALL the air bubbles, the end result is pretty great - especially with my new chairs.


Before - with the new Ikea chairs and scratch up glass

After - with a smooth, durable surface

While I was working on chairs and tables, the dining seats called to me. These are sturdy metal chairs with a cushion attached by several screws. They've been recovered numerous times, but this project got a twist because I decided to paint the frames as well. I purchased Rust-leum Painter's Touch spray paint. It promised double coverage, and at only $3 a can, was one of the least expensive options. To be on the safe side, I bought four cans, but only needed about two and a half. While I don't know that the it actually covered twice as much as a "normal" can of spray paint, I didn't have to go back for a second coat and the finish dried to a nice, glossy black. However, the best thing I bought for this project was a trigger sprayer for paint cans. This little plastic gadget was $2.50 well spent. It clips to the top of a spray paint can and creates a sprayer with a trigger that is much easier to hold and control. In addition, the trigger - which can accommodate two fingers - saved my index finger from a good deal of pain and swelling. If you're going to paint anything large, invest in one of these!

In addition to painting the frames, I put some fresh new fabric on the seats. After posting photos of several swatches, Jeff and I chose a modern floral print. Eventually, the dining table (which is pretty scratched up) will get a coat of white paint to match the cabinets, but for now it is a staging area for other projects. I can't help but imagine how beautiful it wall all be when it's done.

Before - in bronze, brown, and red tones

After - looking fresh and sassy in classic black and white

Sunday, June 26, 2011

Rustoleum Review

A few days ago I purchased Rustoleum's Cabinet Transformations kit to revamp the cabinetry in my bathrooms. The kit comes in dark base and light base which is tinted to match the color of your choice. Including glazed and unglazed finishes there are 48 color variations on the dark base. (Actually, the kit is tinted in 24 colors, but the glaze changes the basic color when applied to double the number of options.) The light colored kit (which I'll be using in the kitchen this week) comes in another set of variations ultimately providing a color for just about every decor.

Before purchasing the kit, I did some homework by reading quite a few reviews both on the Rustoleum website and by independent writers. The consensus was the process and directions were easy to follow, though time consuming. I agree with this assessment, but the large amount of time required is not because it takes forever to apply the product, but because each coat must dry before moving on to the next step. This isn't so bad when painting the cabinet frames, but the doors and drawer fronts have to be painted on the back (dry), front (dry), back (dry), front (dry) before glazing or applying the top coat (which dries for 12 hours before putting the cabinet back together.) That said, this is a simple process that yields excellent results.

In addition, the $80 kits goes pretty far. I completed a double sink cabinet in the master bathroom and am about to do a single cabinet in the guest bathroom without even using half of the materials. At this rate, I should be able to refinish my kitchen cabinets with only a couple of kits and have some left to work on my china cabinet, too. The finish looks smooth and professional, though I was worried after the first coat of paint/bonding agent. The coverage didn't look even and I was afraid I had ruined by cabinets, but once the second coat went on the color evened out completely.

The hardest part of the entire project was taking the cabinetry apart and putting it back together because the hardware fought me (and I couldn't get enough torque with the electric screwdriver). In addition, crawling around on the floor to paint the frame wasn't fun, but it wasn't really difficult, either. One lesson I learned is to be very careful on the edges of the doors and drawer fronts. The directions suggest putting the pieces on racks to make the edges easier to deal with and this helped a lot. However, since the racks take up space it limited the number of doors I could paint at one time (which isn't a big deal on the smaller bathroom cabinets but which will mean I'll have to do the doors in segments when I get to the kitchen). Also, be especially careful applying the top coat. It goes milky white and dries to a glossy clear coat, but if it pools in the corners it remains whitish instead of turning clear. In the end, if a mistake happens I think you could just sand it out and refinish that portion of the project.

Overall, I would recommend this product without reservation. It did a great job of making my cabinets look totally different at a reasonable price.

Here's how the cabinet looked before the paint job. (I forgot to take a photo of the double cabinet in the master bathroom, but all the cabinets in the house are identical.) This one is actually next up for painting tomorrow morning.
This is how the cabinet looked upon completion. I did find a couple of place I missed when applying the top coat, so when I do the next cabinet, I'll be touching those up, too. I'm considering adding some brushed nickel hardware to complete the transformation.
This is the new paint in the guest bathroom. My son spent several days peeling the wallpaper off the lower section of walls. Once he was done, I added the chocolate brown below the molding. Once the cabinet is refinished, the bathroom will be complete except for accessories. (I purchased a pale blue seat cover and rug, but the cover doesn't fit. Alas!)

Friday, June 24, 2011

The Art of Multitasking

Today I've been running a couple of projects at the same time. The big one - cabinet painting in the bathroom - is underway and I'll fill you in on the details when I'm finished tomorrow. In the meantime, I thought I'd show off my clever clock work.

I have this clock that I bought several years ago to match my old decor. Rather than buy a new clock, I decided I could just use this one by changing out the face. Step one, of course, was to take the whole thing apart. Luckily, the front was just held on by four little screws. Once those were removed, it was easy enough to unscrew the hand and remove the battery operated mechanism from the back. The face itself is a heavy-weight paper (like vinyl wallpaper) with the image and numbers printed on it.
Once I had the whole thing apart, I carefully removed the printed face (which was held in place by hot glue) so I could use it as a template for the new insert.
After I traced around the whole circle, I cut off the edge with the time markings to use as a guide when I put the new numbers on the new clock face.
This is the gift bag (from Dollar Tree) I used for the face. It was a little shy on width, but once I cut it open, the sides added plenty of space to trace the full circle. Since I only used one side of the bag for this project, I have another pretty image to save for something else (like another painted box).
Here's the circle including the sides of the gift bag. It didn't want to lie flat at first, so I grabbed my old iron and pressed the back of the paper. (The front has a waxy finish that I though might melt. In addition, I have an old iron dedicated to crafting because I wouldn't want to mess up my husband's good one!)
Here's the finished product. I had some trouble coming up with the numbers and finally used scrap booking stickers since the ones designated for clock faces had limited choices. (Read only one choice here - too small and too light to show up against this background.) I originally planned to use Roman numerals but couldn't find any and was too lazy to print them and cut them all out. Thus, stickers seemed the best option.
Overall, I thought this was an inexpensive way to refurbish my kitchen clock. I paid one dollar for the gift bag and two dollars for the stickers. Now, let's hope I put it all back together correctly and it continues to work well!

Thursday, June 23, 2011

My Home Away From Home

Classrooms are special places to teachers. They begin as a place to work and become a second home - at least that's how I view my room. At the end of the year, I moved to a nicer room (one that actually has windows!), and Jeff helped me with some preliminary fix ups. We painted, moved books and furniture, arranged desks - all the heavy labor. As I've been at school this week working on curriculum, I've stolen a few minutes to decorate the space I live in about 9 hours a day. There is still more to do - put up some fabric and posters on the back wall - but the rest of the room is shaping up. Take a look:

I like to begin my decor at the door! The lettering is from a botanical alphabet coloring book while the little sayings are stickers I picked up at Dollar Tree. (They're great because they come off easily if they need to be re-positioned or removed.
Here's a better look at all my little sayings. "In a world where you can be anything - be yourself." "The best things in life aren't things." "Friends are the flowers in life's garden." and "Oh, the places you'll go!" There are actually more of these scattered around the room with quotes from Emily Dickinson, Ralph Waldo Emerson, and others.

A white board hangs on the left upon entering the room. I've hung jazz themed art above the board to give the place a homey feel. (These are actually pictures that used to hang in our house, but they didn't match the new decor!)
Next comes the "brag wall." This began when Jeff and I taught in Safford, Arizona. Our principal at the time asked everyone to create a wall with awards, photos, all kinds of artifacts that represent who we are, where we come from, and our unique qualifications. This has become standard in every classroom I've had since.
While a shelf full of stuffed animals may seem incongruous with a high school English class, the kids and I have a  good deal of fun with these. They get passed around, tossed across the room, used as props, and "talk" to students about specific topics (i.e. the Emily Dickinson doll sings her poetry to the tune of Gilligan's Island while the three little kittens (Byron, Keats, and Shelley) discuss romantic poetry.
The side of the room away from the door needs some art, too. Once again, posters that used to adorn the walls or our house now liven up the walls of my classroom.
This little display by my desk is new and serves as fair warning to the kids about my caffeine addiction.
This also hangs near my desk. It is the first "teacher" item I ever owned - a gift from my mom - and has hung in every classroom I've had.


So, that's the grand tour. The back walls (behind the book shelves) have light green bulletin board areas which will be covered with some kind of funky fabric before school begins. (I have a rather extensive stash, but I'm leaning toward the furry stuff!) Thanks for visiting my home away from home!


Small Victories

Since I've spent the better part of this week working at school, I haven't spent much time working on the myriad summer projects lined up at home. Though adapting new curriculum standards is gratifying (especially since it means I have long-term planning squared away for my juniors), it isn't particularly fulfilling in a creative way. So, I spent a little time each morning working on a small project with some big punch.

Recently, when I was in East Tennessee, I kept seeing painted tin stars. My favorite had a sky blue background with a little bit of softness added in sponged on clouds and a series of birds painted across the points. These sold for about $35 in several places. Deciding I couldn't bring myself to pay that much for a painted star, I resolved to make my own. Last week I found a plain star at JoAnn's for about $7, but after carrying it around the store, I couldn't decide where to hang it and opted for this $3 pressed cardboard craft box instead figuring I could put some of my ever-growing collection of costume jewelry inside. (Actually, having finished this one, I'm leaning toward doing a couple more so I can create a display with the storage.) 

First, I painted the box in a basic sky blue (using plain craft paint from my stash). Since it is cardboard (read susceptible to warping under too much moisture) it's better to do this in several light coats. The good news is that the paint soaks in quickly and by the time I finished covering the box with one coat, it was dry enough for the next. Following this step, I walked away for the day, but I'm sure an hour of drying time would be sufficient to move on.

Next, I "sponged" on some white paint. My intent was to apply a little and then soften it with a stippling brush to give a cloud effect, but I liked the starker contrast of the bright white against the blue, so I skipped that part. I achieved this effect using a tiny amount of paint and a piece of wadded up plastic wrap. I applied the white to the outside, but left the inside solid blue.

While the paint dried, I cut up a gift bag (el-cheapo deluxe from Dollar Tree). This was a pretty small bag, but it yielded plenty of flowers and birds to apply. (Of course, if you're more artistically talented than I am, you could paint your own directly on the box.) Cutting around all the little leaves and details was the hardest part of the whole project.

Next, I used a good coating of paste (from a glue stick) to adhere the cutouts to the box. The glue stick is pretty slick and forgiving which allows time to move the pieces around. Just be sure to stick down all the little pieces and edges. Finally, use a sponge brush to apply a thin layer of white school glue over the entire piece to seal it. This photo is the top/front of the box.

Side one of the box

Back of the box

Side two of the box

Inside the box